
Game Development is full of surprises. Completely different problems can be solved with the help of a pretty similar solutions. Let’s take two examples:
- Post Effects. This is a very powerful mechanism of adjusting the rendered picture right before displaying it on the screen. Using the effects it is pretty easy to add the fog or increase the brightness, etc. But in case if the game screen displays not only the environment but also some UI elements (health bar, number of points, etc) it turns to be a problem to apply the effects only to the particular part of the picture skipping UI.
- First Person Shooter. Having first person view in the game the player always sees own gun. This gun is usually attached to the player’s model. The model itself has a collider that interacts with the environment (detects collisions and prohibits passing through the walls, etc). In case if the player has to come up to the wall very closely it can happen that the gun can pass through the wall. Having a separate collider attached to the gun would not solve the problem since it would block the player from coming close to the wall.
But how to deal with these, at first sight, different problems?
First, it is required to understand the common problem between those two examples. In general it sounds like this: one part of the screen has to be rendered independently from another. Having in mind the fact that the resulting picture on the screen can consist of multiple cameras, the solutions seems pretty obvious. And in fact it is, the only thing that might be tricky here is a configuration of cameras.
Problem
Here is a visual representation of the second example.

Step 1. The player stays far enough from the wall
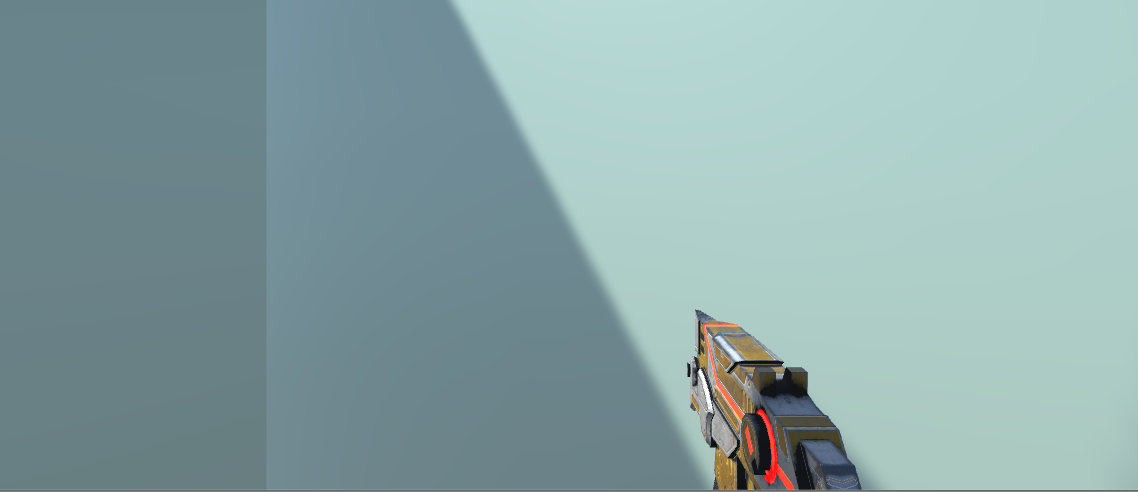
Step 2. The player comes closer to the wall. The gun is clipping through the wall now
Solution
In general, the solution would be the following:
- One camera (first) renders environment only (without the gun).
- Another camera (second) renders the gun only.
- The order of rendering is defined by the camera number.
- A combined picture will have a gun always on top of the environment.
Done, now it time to make a proper configuration.
Implementation
At this moment there is only one camera on the scene: it is attached to the player to follow him. Additionally, it has no specific configuration. The second camera can be attached to the player and positioned in the same way as the first one.
Now the configuration. There are three important properties that will help to implement the solution:
Clear Flag – is a simple words it is the configuration that defines how to deal with the empty part of the screen (where none of the objects is located).
“Skybox” option means that the empty space must be filled with the configured skybox.
“Solid Color” is pretty similar to the previous one but it is much simpler, it fills the empty space with a selected color.
“Don’t clear” mode allows each new frame to be drawn on top of the previous one without any clean up being done.
“Depth only” keeps empty space always cleared what makes this part of the image transparent. This allows combining multiple cameras together where each camera can draw separate objects but the result can contain all of them.
Culling Mask – the list of layers to be rendered by the camera.
Depth – the number that defines the position of the camera in the drawing queue. The higher the number the later the camera will be drawn.
Example: #1 will be drawn on top of #0.
Since “Culling Mask” is working with layers it is required to put a gun object into a separate layer, for example into a new one called “Weapon”.
Player Camera Settings
This camera must be drawn at first, thus it can use skybox. But it shouldn’t draw a gun since it will be drawn later.
| Parameter | Value |
|---|---|
| Clear Flag | Skybox/Solid Color |
| Culling Mask | All layers except of the new one “Weapon” |
| Depth | 0 |
Gun Camera Settings
This camera must be drawn at last, keeping empty space transparent so underlying layers can be still visible. The only layer it should draw is “Weapon”.
| Parameter | Value |
|---|---|
| Clear Flag | Depth Only |
| Culling Mask | “Weapon” layer only |
| Depth | 1 |
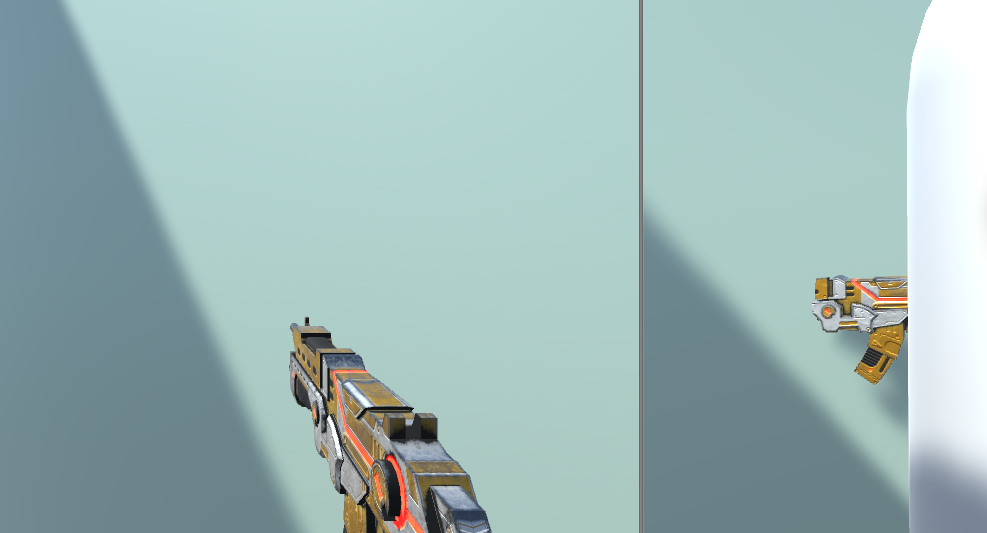
Result
In the editor (right side of the image) the gun is still clipping through the wall, but in the game (right side of the image) everything looks fine.
Links
![]()
Thank you for the excellent explanation!
I would like to ask a further question regarding post processing effects.
In your example, let’s say, if you want to apply a blur effect only to the weapon, how would you do it?
I ask this because I have been trying, working with layers as well, to apply the effect only to this “front” object, but the back also gets affected…
Would appreciate your advice!
Best regards,
Andre
What comes first to my mind is that you can control what camera “sees” via layers matrix. Via it you can uncheck layers and then apply post effect.
Thank you for your reply! I’ll give it a try!