One of the most important things in every game, that gives each player a feeling of diving into gameplay, is a feedback. Game feedback can be expressed in many different ways but the main idea behind is the same – the player must feel that the game reacts on any action or event that happens. Feedbacks can be different, starting with a sound or visual effect and ending with narrative or storyline changes.
A couple of real examples where the feedback is missing:
- FPS. The player shoots but the gun stays frozen on the screen. To add some realism the gun can simulate kickback with an appropriate animation.
- Horror game. The player goes through the typical “dangerous” tunnel and at the end of it meets the creature and begins a fight. And game turns into “hack and slash”, but having creepy sound effects in the tunnel can make a real horror-like atmosphere.
Usually, a good feedback does not need to be difficult or complex. It is even vice versa, very often it is enough to play a simple sound or shake the camera in some concrete moment and it already can contribute a lot to the gameplay. One very popular example when the player expects to have a feedback is damage infliction. When someone hits you, you want to know this. This feedback is usually implemented as a camera shake, that simulates a head shake after hit. From the first sight it seems not very clear how to simulate this but in Unity it can be done in one line of code!
Theory
Usually, the movement of the head after hit is quite random. This means that simulation of a head shake does not require a lot of math to be involved, even opposite, the camera can be moved quite randomly and still behave as it is required.
Although the movement is random it still must follow a couple of rules:
- It must be chaotic, means following different directions.
- It must be local, means the “head” should not move very far from the “body”.
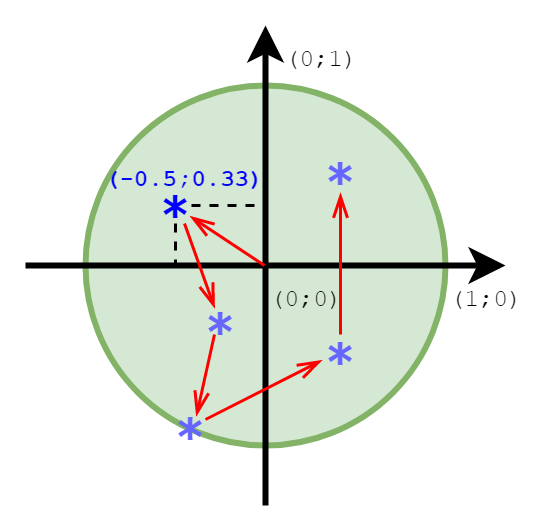
The straightforward implementation of these rules cannot be done in a single line of code (of course it can be very long line ^_^). But Unity provides very useful API for this purpose: Random.insideUnitCircle 1. It returns a random Vector2 that is located inside the circle with radius = 1.
A series of randomly generated points can produce quite realistic path for the camera to be moved along to simulate a nice shake effect.
Here is an example for 5 random points (red arrows show the path):

Of course, the number of points and their distance from the center can be tuned but the approach in general works.
Practice
The Shaker component is pretty simple. The key things of it are following:
- Effect Strength and Duration are configurable.
- Initial Camera position must be saved (line 14) and restored (line 20) at the end of the shake, otherwise the “head” can appear in a wrong place.
- The shake logic is simple: generate a new random point -> push the camera there -> repeat (line 24).
public class CameraShaker : MonoBehaviour {
	public float Strength;
	public float Duration;

	private Vector3 _initialCameraPosition;
	private float _remainingShakeTime;

	public void Shake() {
		_remainingShakeTime = Duration;
		enabled = true;
	}

	private void Awake() {
		_initialCameraPosition = transform.localPosition;
		enabled = false;
	}

	private void Update() {
		if (_remainingShakeTime <= 0) {
			transform.localPosition = _initialCameraPosition;
			enabled = false;
		}

		transform.Translate(Random.insideUnitCircle * Strength);

		_remainingShakeTime -= Time.deltaTime;
	}
}
Result
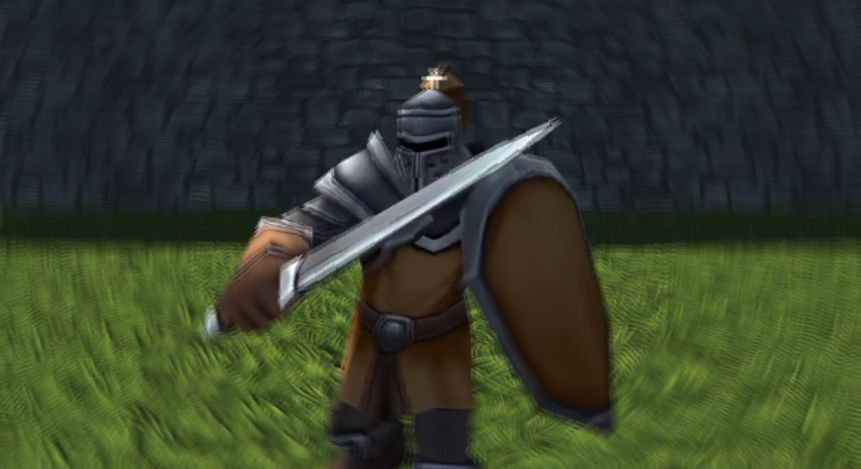
Without a feedback
With a feedback
The difference in gameplay perception is significant.
Source Code
The complete Unity project can be found here camera-shake.
Used Assets
Special thanks to all creators who post free assets on the store so others can play with them.
Assets used in the current project:
- Knight – Asset Store
- Grass Texture – Asset Store
- Wall Texture – Asset Store
Links
1. https://docs.unity3d.com/ScriptReference/Random-insideUnitCircle.html
![]()

Be First to Comment